Facebook fundraising can be a nice supplemental revenue source for your nonprofit. The easy to use tools, and even better, easy to donate, help people launch peer to peer fundraisers for causes they support. Facebook Fundraisers have a place in your fundraising mix. It’s a tool for people who wouldn’t normally click through to your website to give.
The downside to Facebook fundraising is many people don’t provide their contact information to you for followup. Facebook handles tax receipting, so you don’t get the donor information unless the donor opts in. However, you should expect 10-15% of donors to give you their contact information. You can download this information in Facebook Settings for your page. Here’s how.
1. Navigate to Your Facebook Page
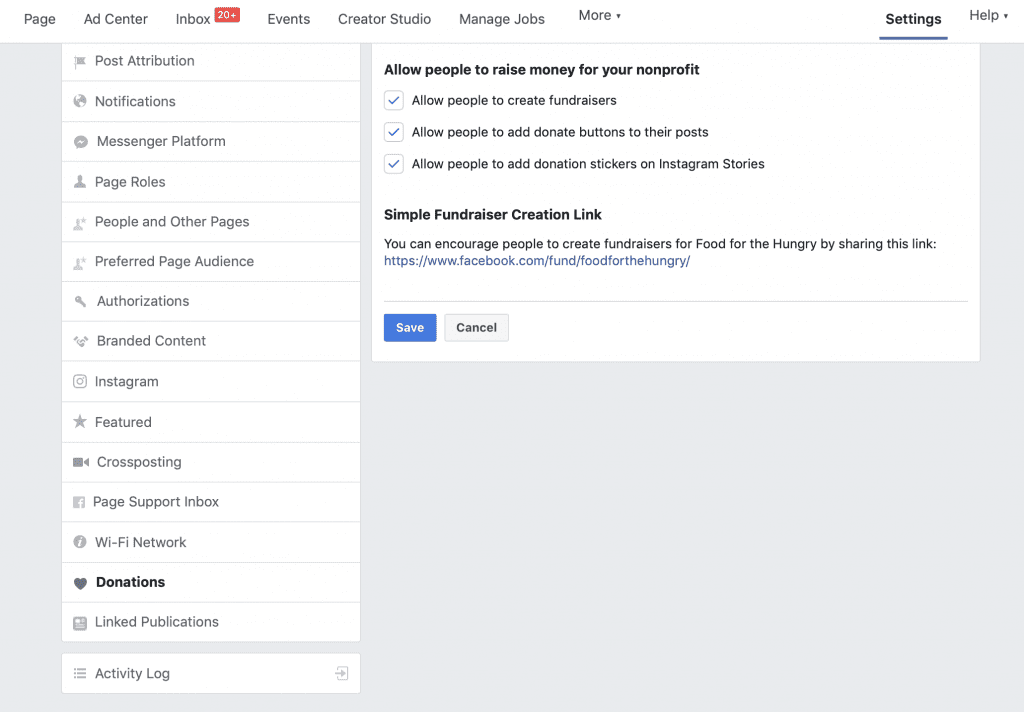
Navigate to the Facebook Page for your organization. This is where Facebook fundraising is managed. At the top, click on the Settings link:
This takes you to the Settings for your Facebook Page.
2. Select Donations
Near the bottom of the navigation on the left is the Donations option. Select that to be taken to the reporting section. You can also use this option to manage your Facebook Fundraiser settings.
3. Download Donation Reports
Click the Download Donation Reports button to download your donor data.
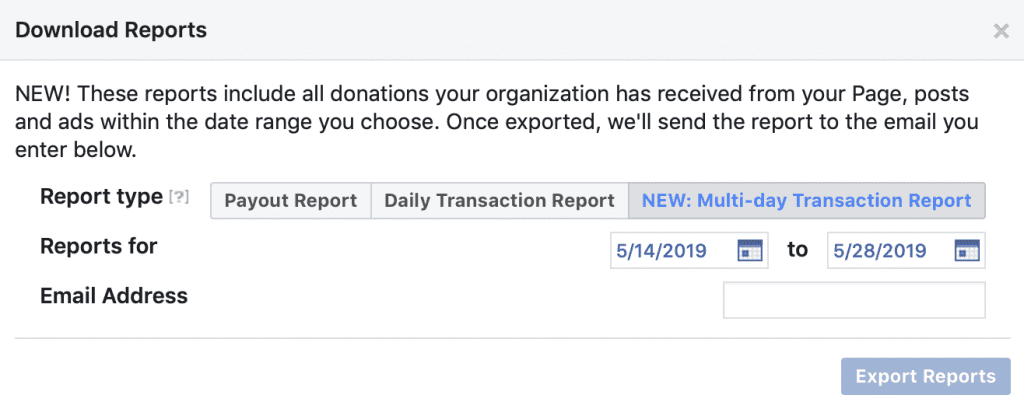
4. Transaction Report
Select the Multi-day Transaction Report and select the timeframe for your report. Enter your email address and click Export Reports. Facebook will send the CSV report to you via email. You can import the CSV into Microsoft Excel, Apple Numbers, or Google Sheets to view your data.
Remember, Facebook is receipting donors giving to a Facebook Fundraiser so your organization doesn’t need to. If you import your data, don’t import the donation information to be receipted. Facebook gives your organization the total amount given.


